The recent rapid development of the TRON blockchain has brought extensive application opportunities to its ecosystem, particularly in the area of stablecoin trading. According to data, TRON's USDT trading volume reached a staggering $1.25 trillion in the second quarter of 2024, nearly matching Visa's settlement volume.
As TRON's position in global trading continues to rise, project teams within its ecosystem are increasingly demanding efficient token issuance and management tools. However, if you lack coding skills or technical knowledge, issuing tokens on the TRON blockchain can be somewhat challenging.
This article will teach you how to issue tokens on the TRON blockchain using a one-click token issuance platform like PandaTool. The entire token issuance process is roughly as follows:
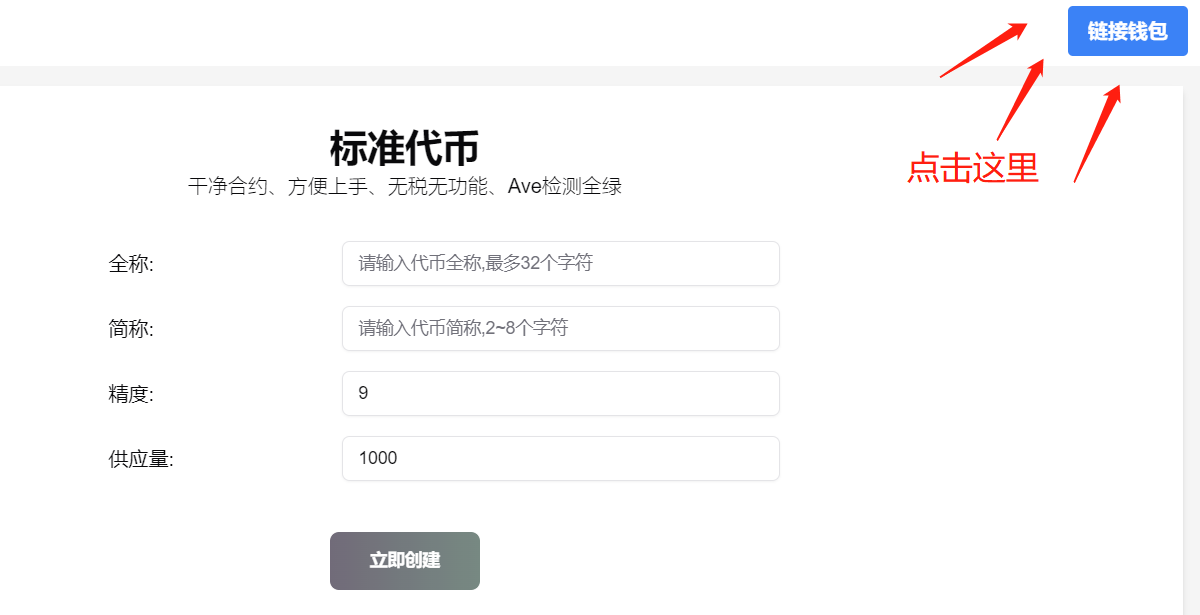
Enter PandaTool and connect your wallet.
Fill in the token parameters, such as full name, abbreviation, etc.
Create the token.
Token contract verification and open source.
Enter token information and upload the logo.
Next, I will introduce the entire process step by step.
I. TRON Token Issuance
1. Enter PandaTool and Connect Your Wallet
The first step in all token issuance tutorials is to connect your wallet. First, we open the TRON token creation website: https://tron.pandatool.org/, and click the link in the upper right corner to connect the wallet.
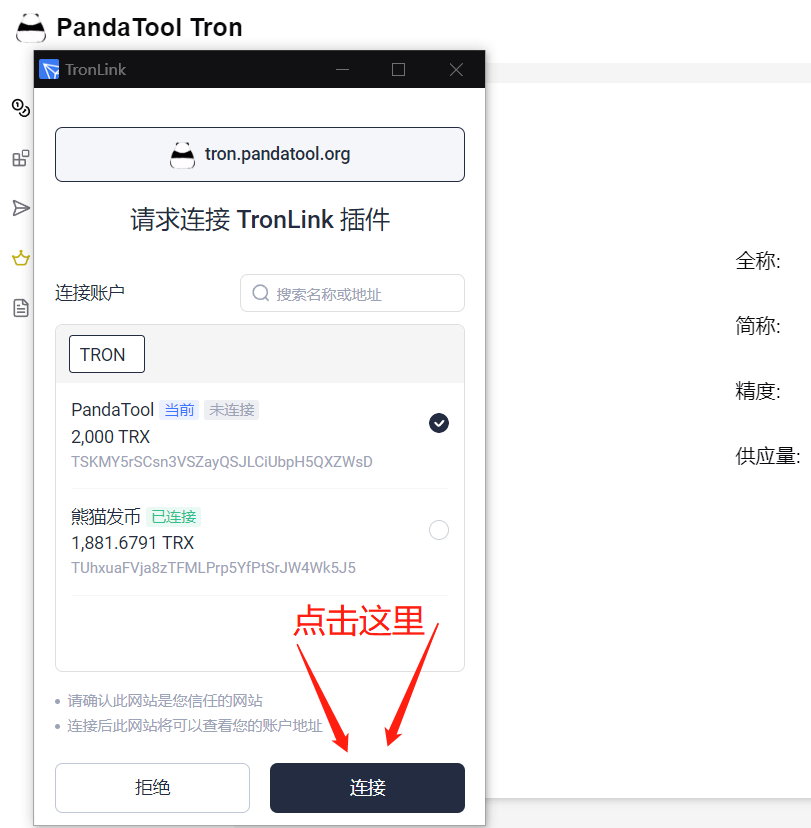
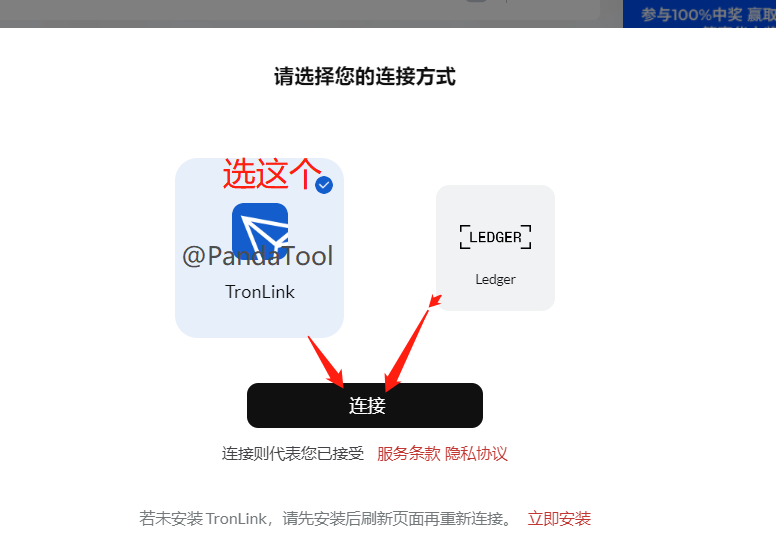
At this point, a prompt from the TronLink wallet will pop up; just follow the instructions to connect.
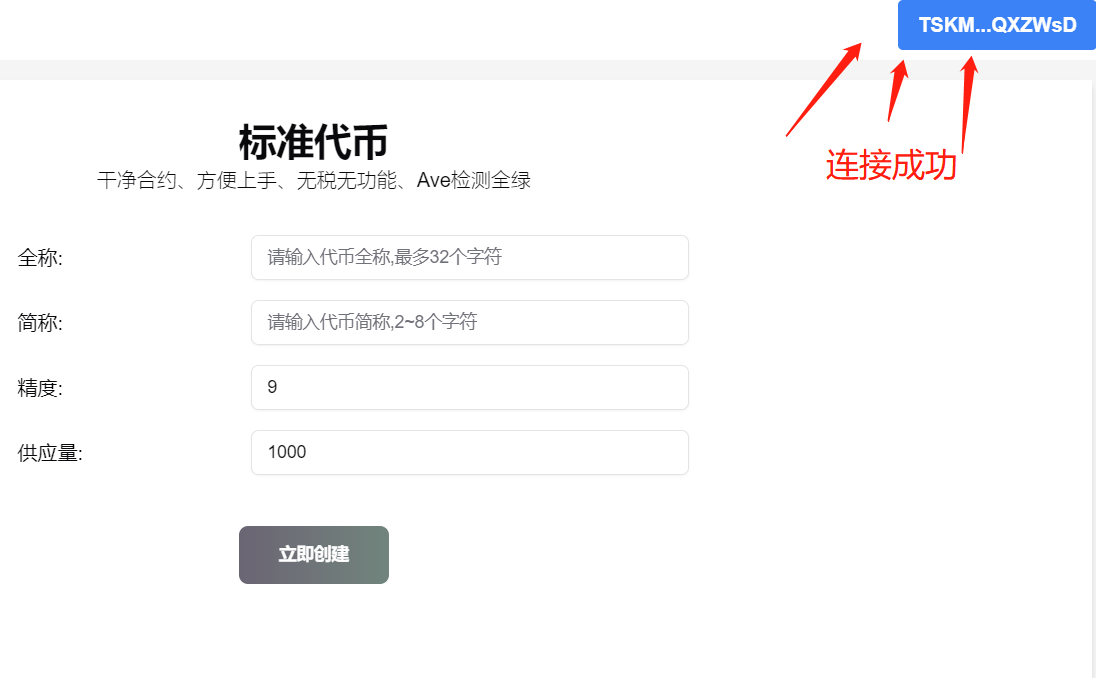
Once connected successfully, your wallet address will appear in the upper right corner, indicating that you can proceed to the next step.
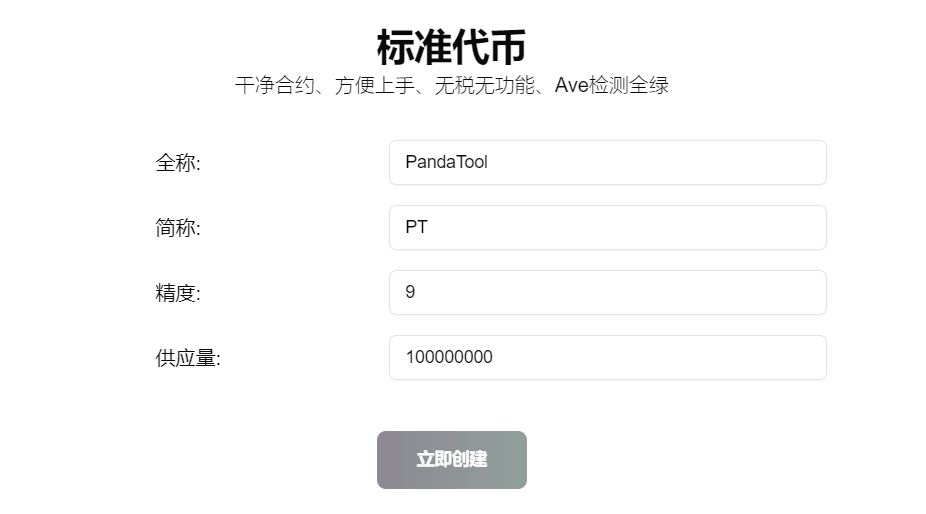
2. Fill in the Token Parameters
Today, we will only teach about standard tokens, and all parameters are very simple, consisting of four: full name, abbreviation, precision, and supply.
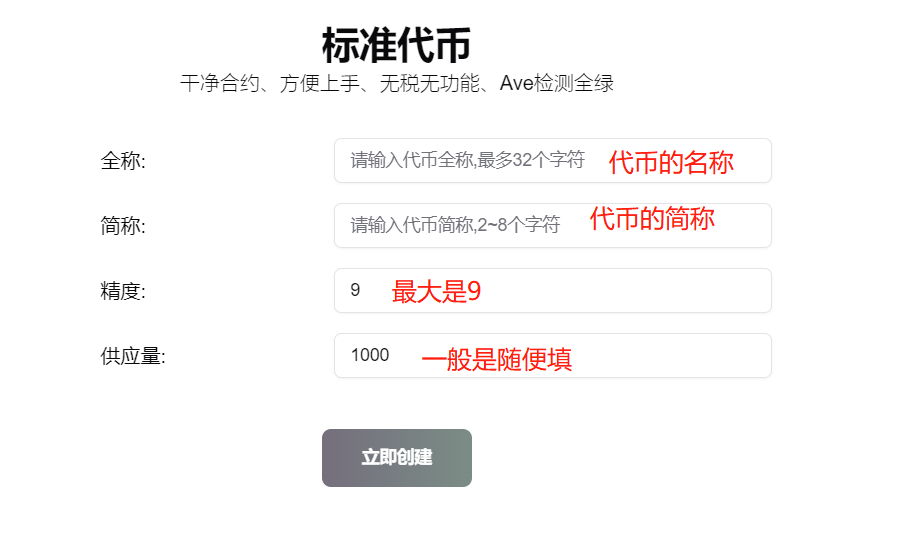
Full Name: No more than 32 characters, preferably in English (Note: Chinese tokens may be blocked).
Abbreviation: Generally 2 to 8 characters, preferably in English (Note: Chinese tokens may be blocked).
Precision: Maximum of 9, minimum of 1.
Supply: There is no upper limit as long as the number is not excessively outrageous.
For example, if I want to issue a token named PandaTool with the abbreviation PT, I would fill it out like this:
3. Token Creation
After confirming that the information is correct, click the "Create Now" button, and a wallet prompt will pop up for you to sign and confirm.
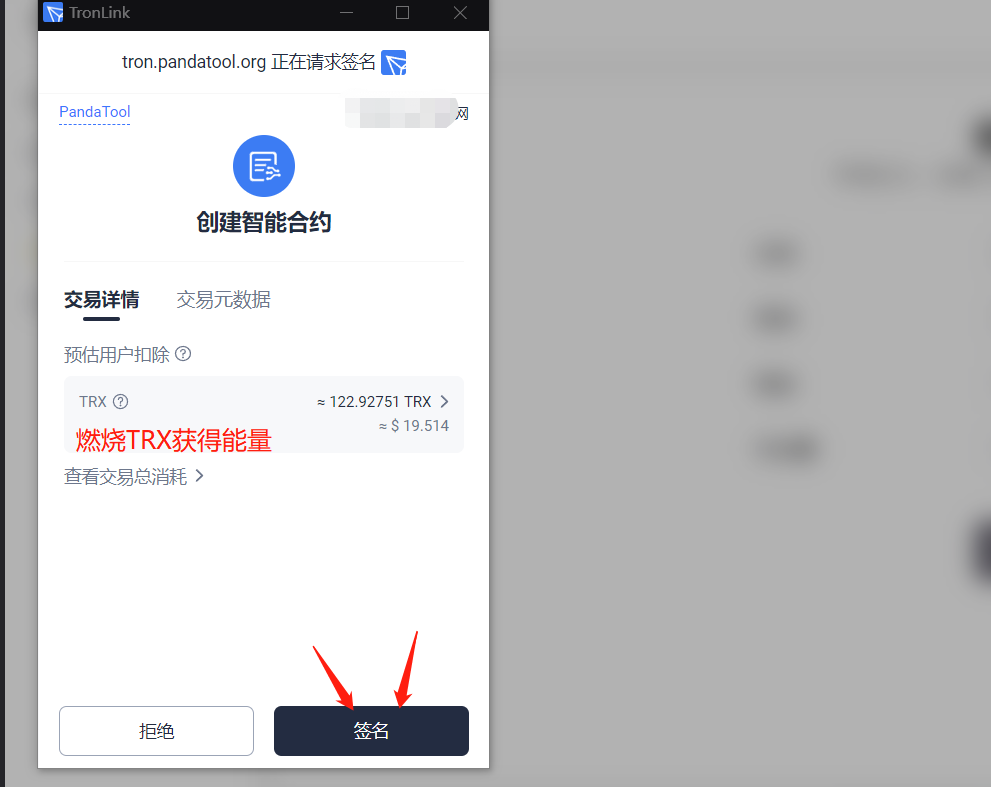
On the wallet confirmation page, you will see a TRX consumption. This consumption is mainly used to burn for energy. Issuing a token requires approximately 560,000 to 600,000 energy, and burning about 122 TRX can obtain this energy. If there is sufficient energy in the wallet, this TRX fee can be waived.
After clicking to sign, wait a few seconds, and the token issuance will be completed.
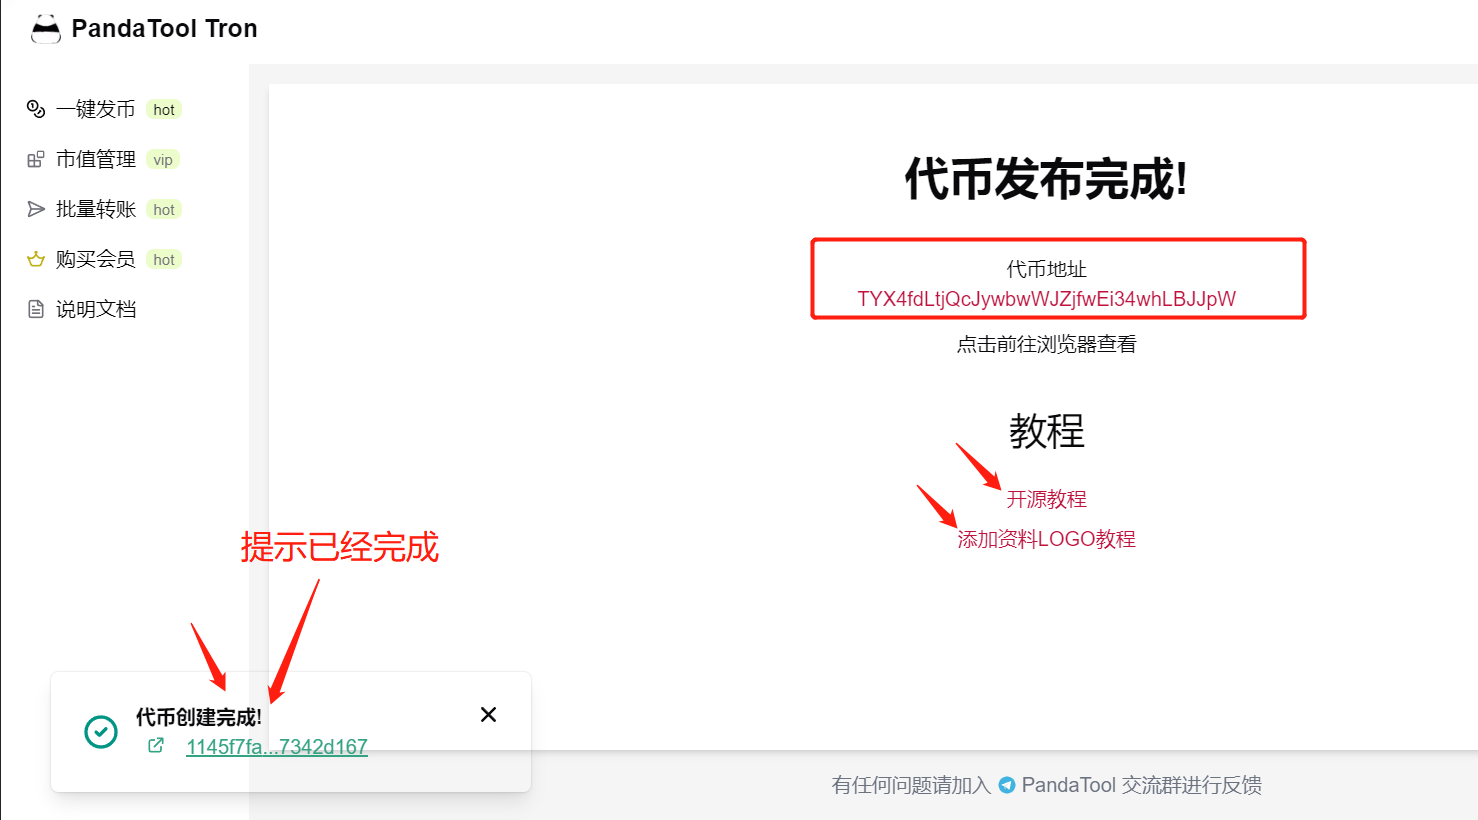
On the successful token issuance page, you can see your token address. At this point, the entire token issuance work is considered halfway done. Next, you can continue with the token's open source and information addition.
II. TRON Token Contract Verification and Open Source
1. Find the Open Source Entry
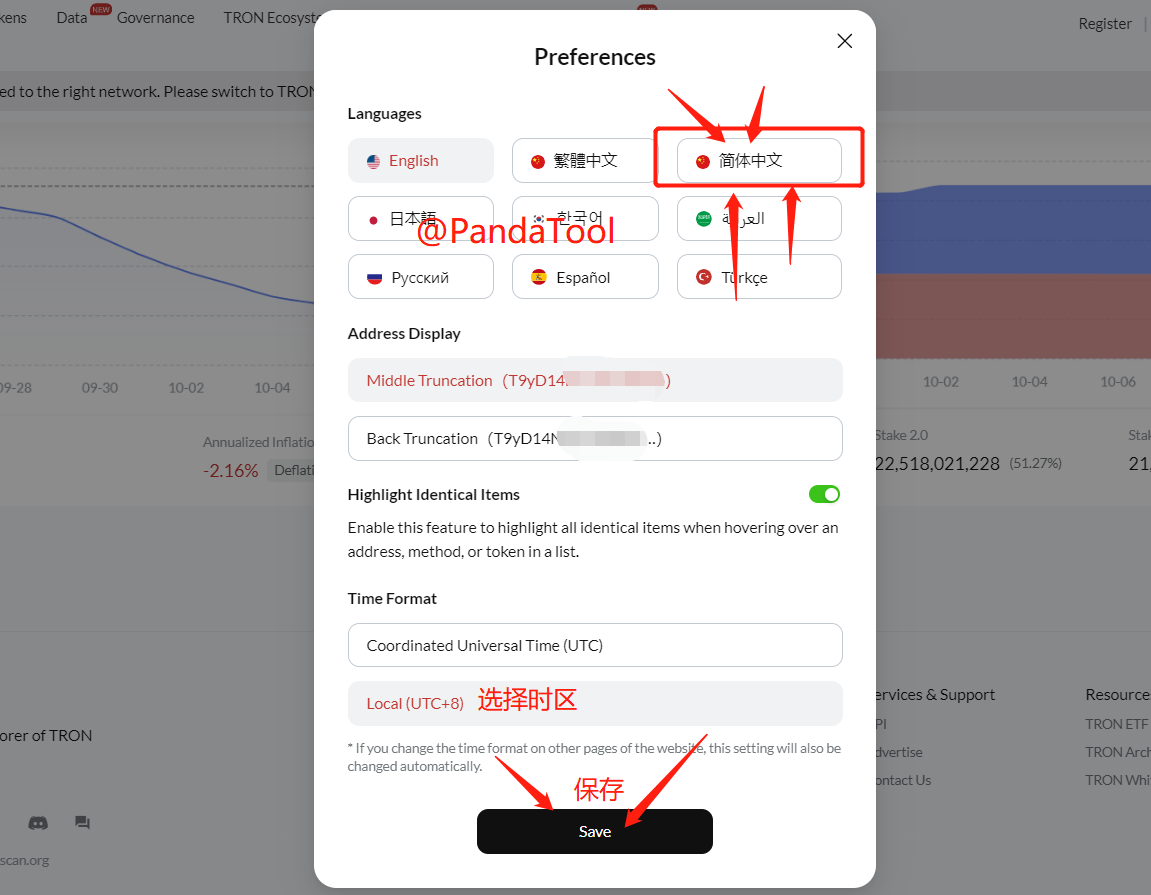
First, we need to find the open source entry on the TRON official browser. Open the browser link: https://tronscan.org/, and without doing anything else, set the language first.
Scroll to the bottom of the browser to find Preferences and click to set preferences.
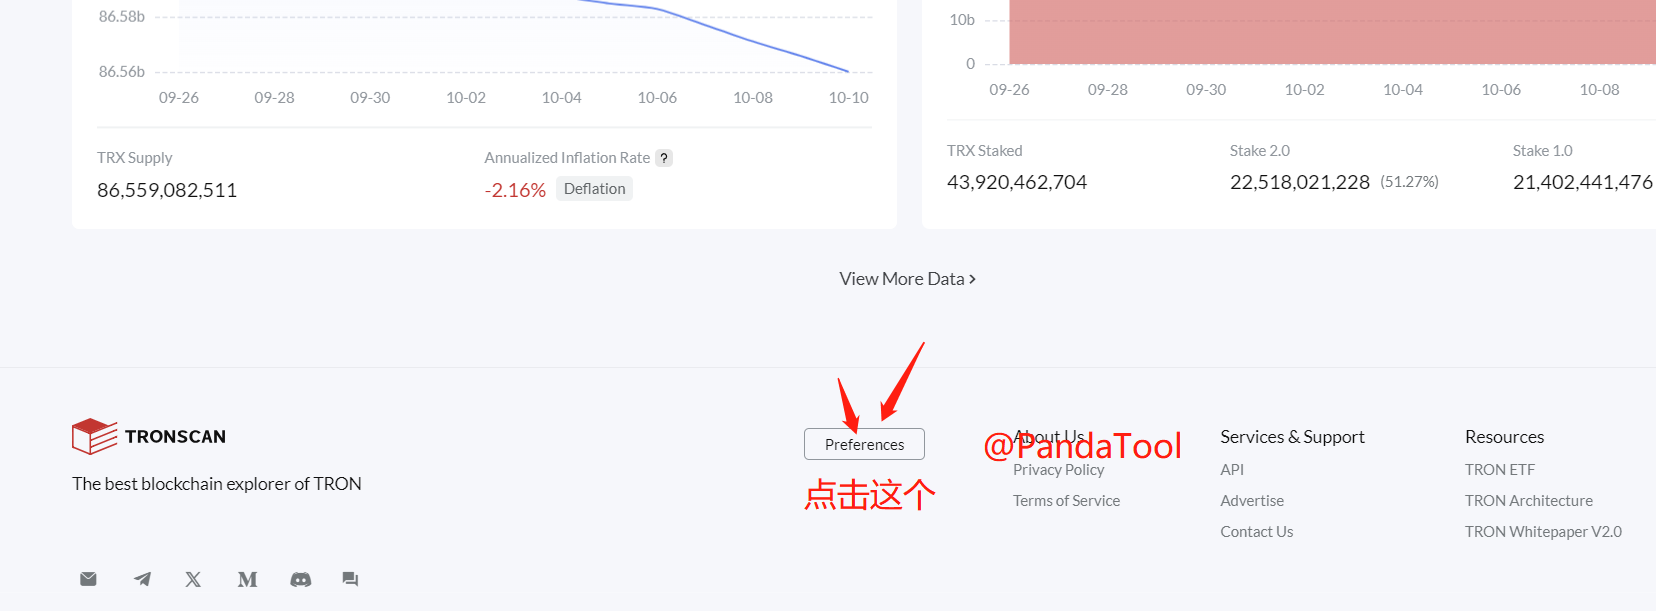
Then, in the settings that appear, select Chinese and click Save.
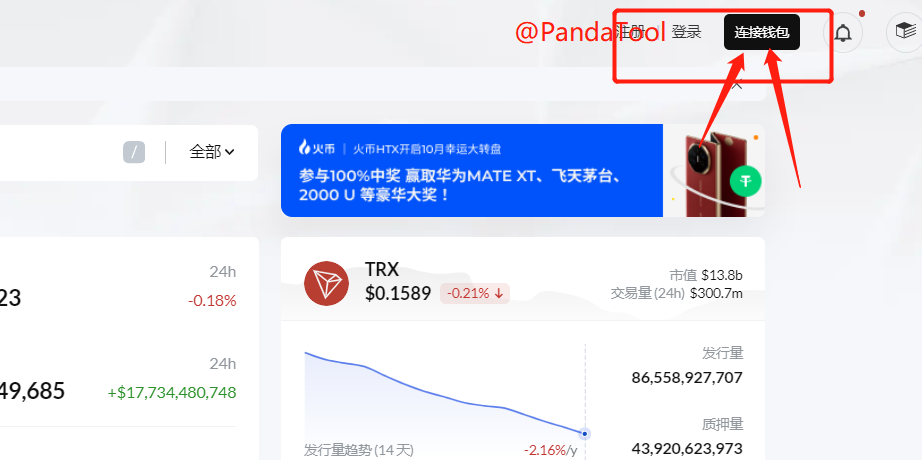
Once the browser changes to Chinese, click the wallet connection in the upper right corner to log into the browser.
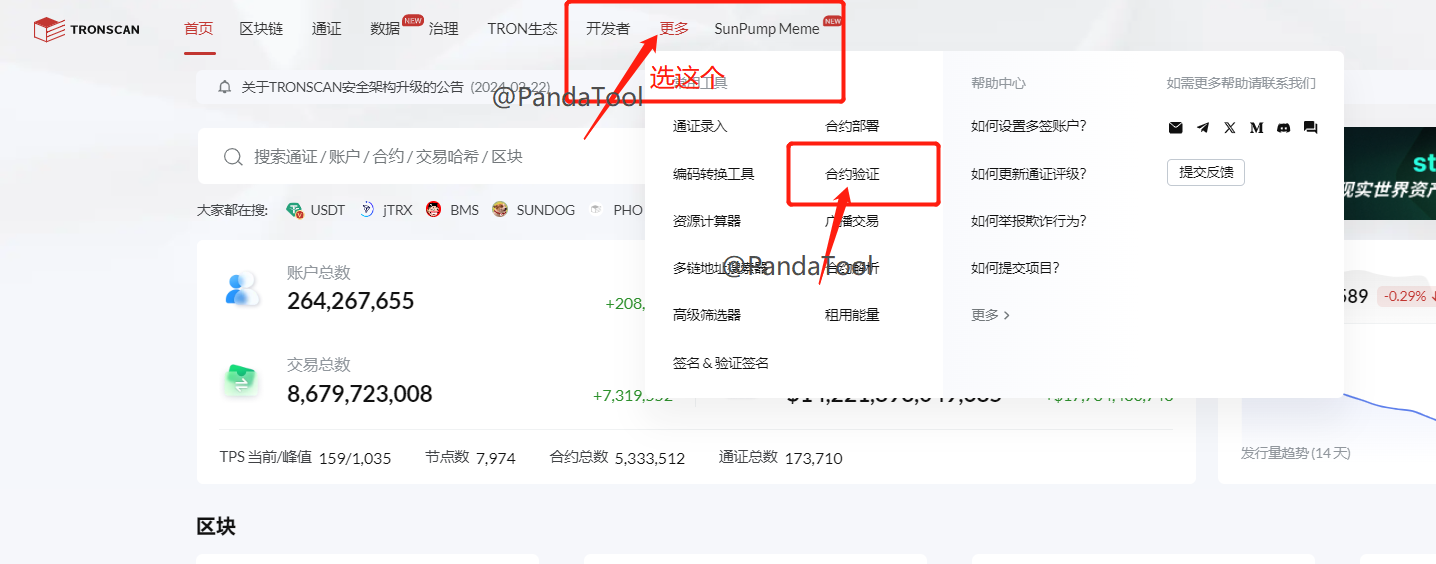
After successfully connecting the wallet, find More in the top menu bar, and then select Contract Verification from the list of functions.
2. Fill in Open Source Parameters and Upload Source Code
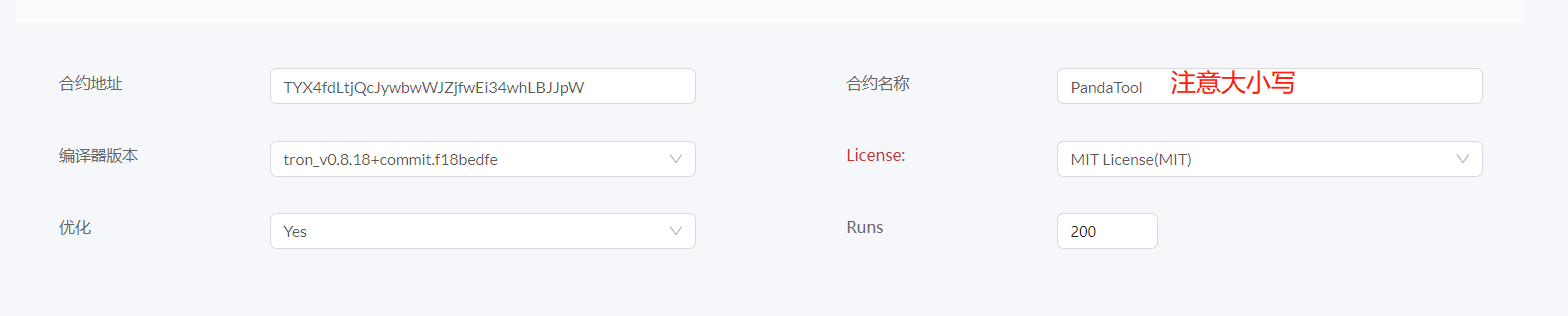
On the contract open source page, we can see the following information.
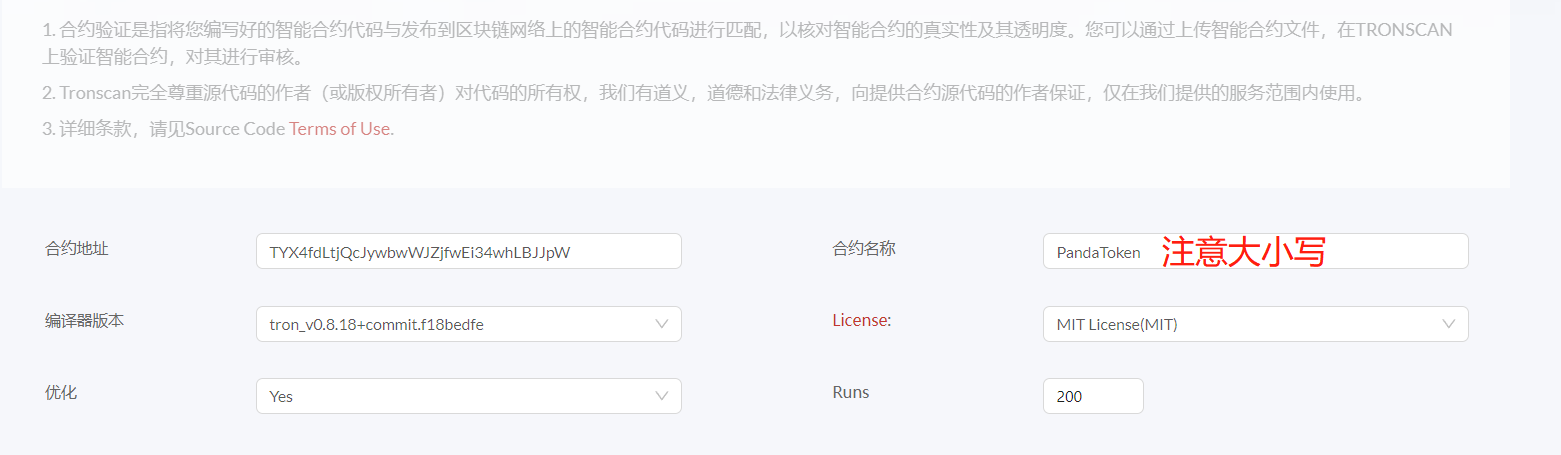
If you feel confused, don't worry; I will guide you step by step on how to fill it out.
Contract Address: This is easy to understand; it is your token address.
Contract Name: Fill in PandaToken (Note: Be careful with capitalization).
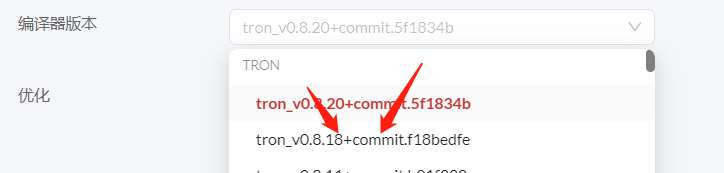
Compiler Version: Select tron_v0.8.18.
License: Select MIT.
Optimization: Yes.
Runs: No.
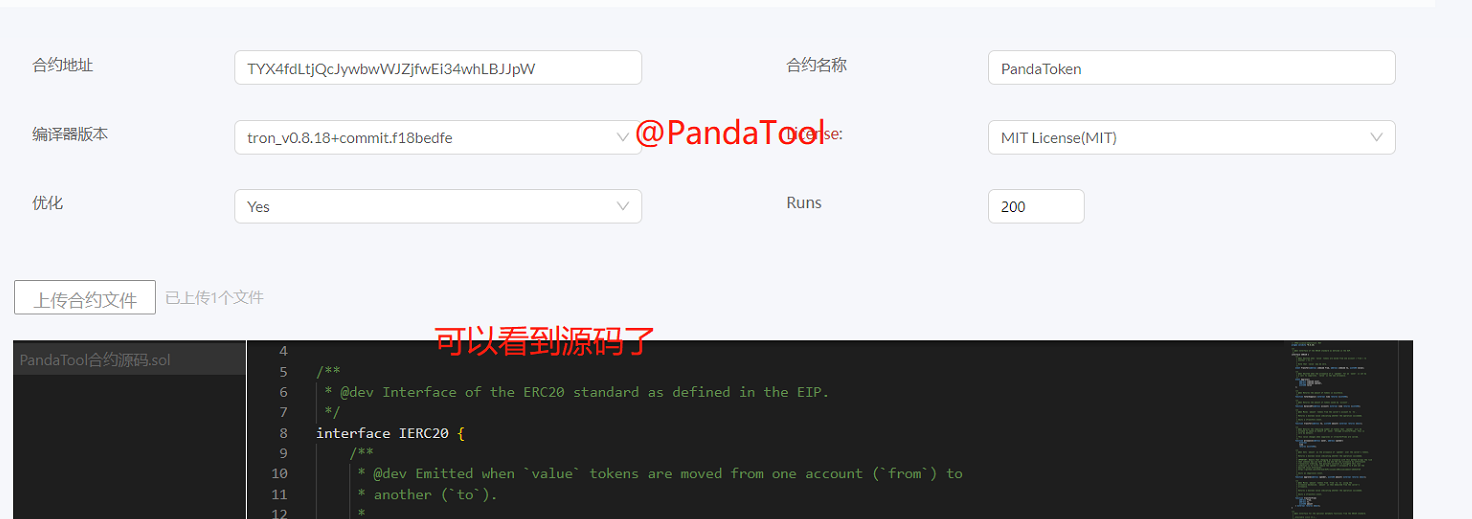
Please note that except for the contract address, which is your own, all other entries must be correct. For example, my filled information looks like this:
After filling in the parameters, it's time to upload the contract file. We will upload the contract file we just downloaded. If you haven't downloaded it, you can click here to download it.
PandaTool Contract Source Code.sol
Once the contract file is successfully uploaded, you will be able to see the source code.
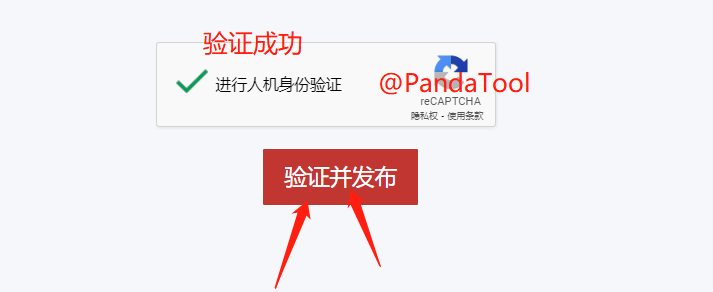
3. Verification and Publication
After uploading the file, scroll down the page to find a CAPTCHA prompt, click to perform the Google CAPTCHA verification.

Once the CAPTCHA verification is complete, click Verify and Publish.
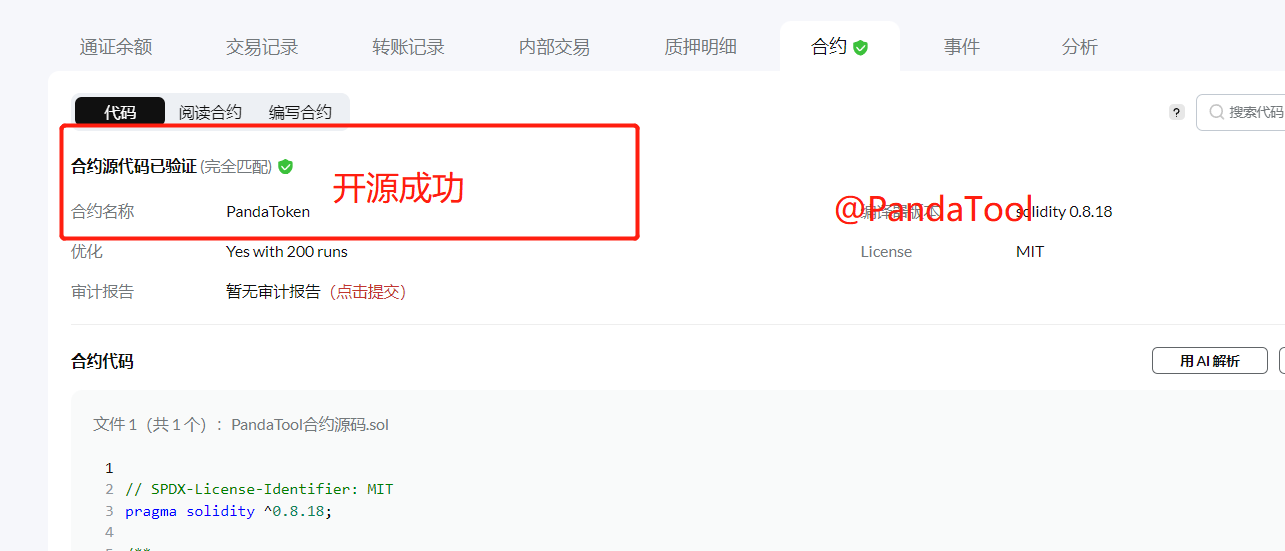
Wait a few seconds; if the open source is successful, you will be redirected to a new page where you can see your contract source code.
If the open source fails, you will see the following prompt.
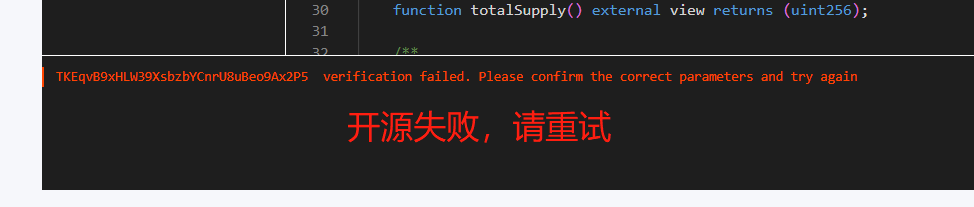
At this point, you need to check again to see if the open source parameters were filled in correctly. After refilling, refresh the page and try again.
III. TRON Token Information Update
1. Find the Issued Token
Similar to Contract Open Source, we also need to enter the TRON official browser and perform the Chinese setting, wallet connection, and other operations; this part will not be elaborated on.
After connecting the wallet, click on your wallet address in the upper right corner and select Wallet Management.
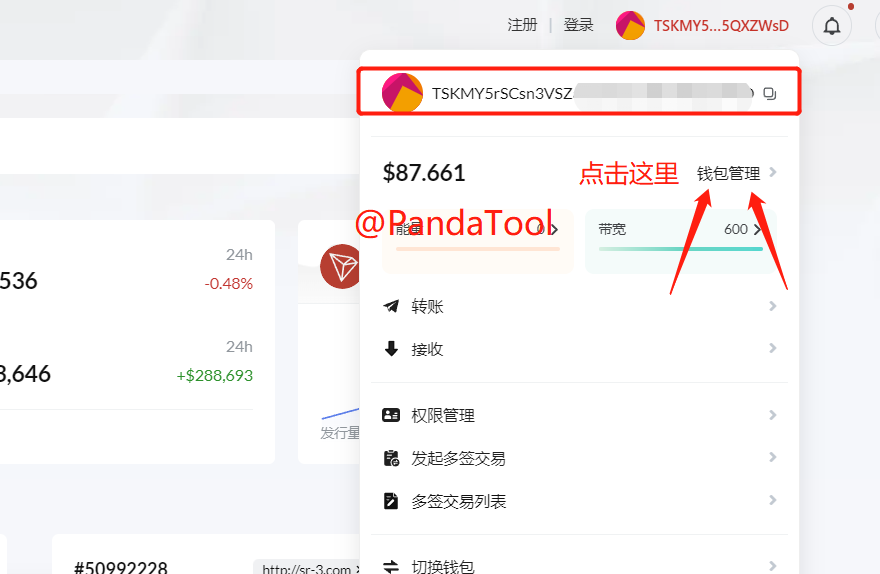
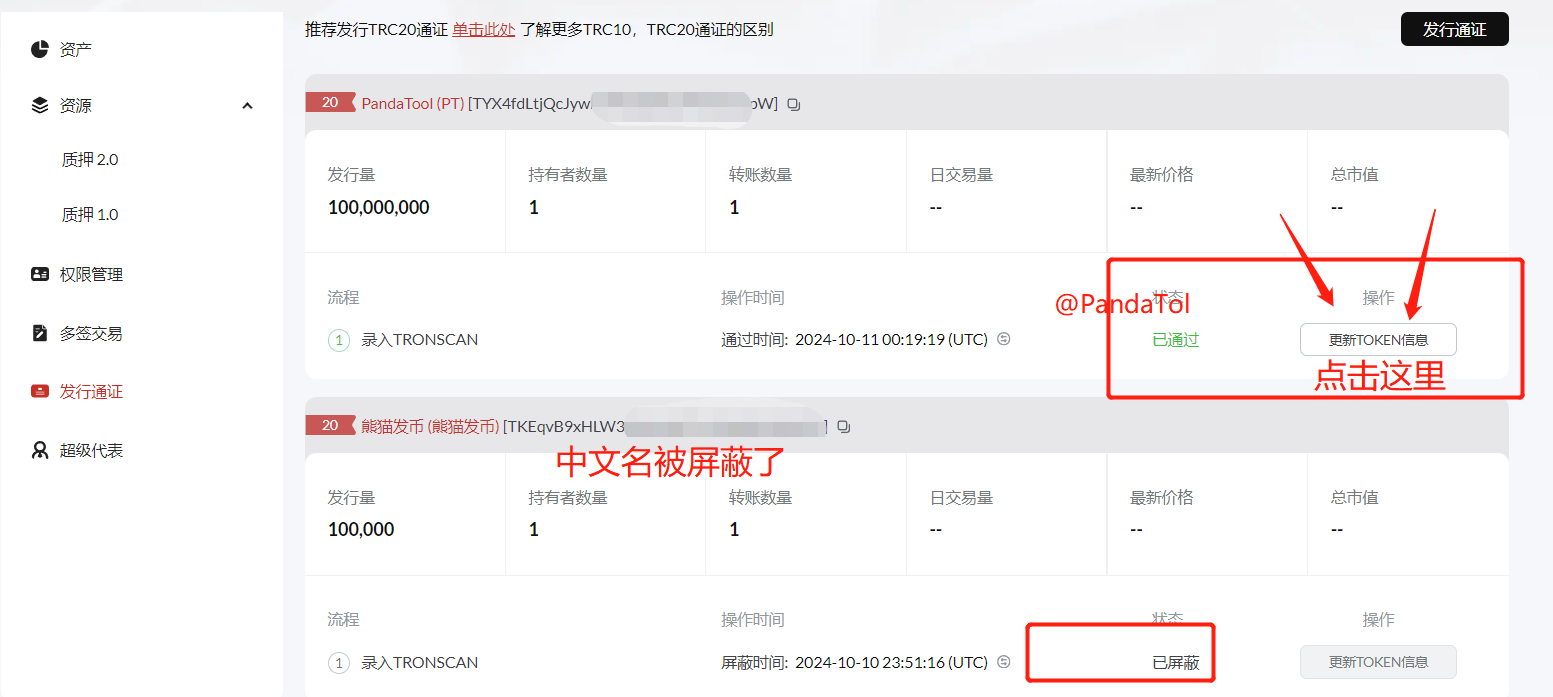
Next, you can see your wallet information, including energy and other details. Click on [Issue Token] on the left side.

At this point, you can see all the tokens issued in your wallet. If you want to enter a specific token, select that token and click [Update Token] information.
2. Update Token Information
After clicking to update the Token information, you will be prompted to select the token type, which defaults to TRC20. We can directly click next to see the page for updating token information.
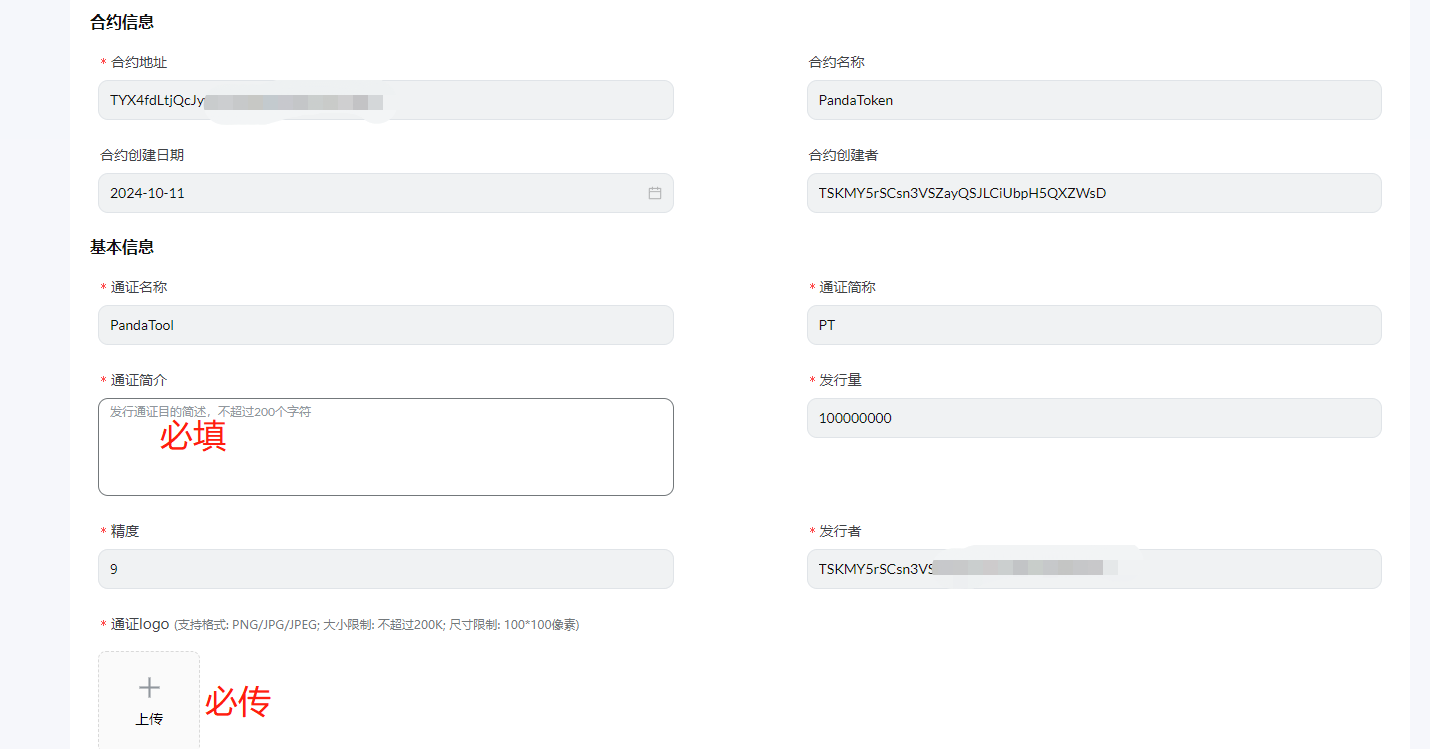
Most of the information on this page has been automatically filled in; we only need to fill in the information marked with an asterisk, which is mandatory. Specifically, there are the following items:
Token Description: This is your token's description/introduction, no more than 200 characters.
Token Logo: This is your token's logo; pay attention to the dimensions and size (100*100).
Project Website: A link must be provided (it doesn't have to be your own).
Official Email: An email must be provided (it doesn't have to be your own).
Social Media: This can be filled in or left blank.
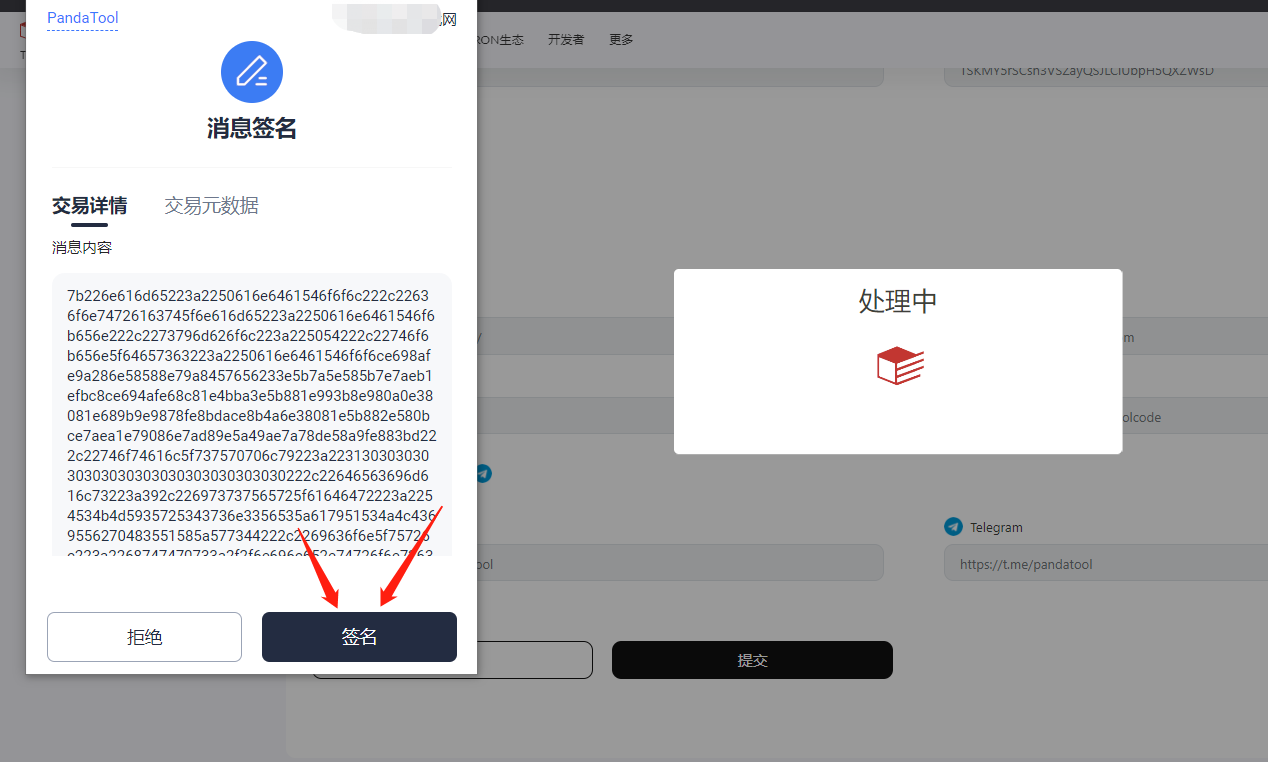
Among these, all the information is straightforward except for the logo upload, which needs to meet the specified dimensions. When uploading, the wallet will require a signature confirmation, as shown below.

In general, the more comprehensive the token information, the higher the corresponding rating. For example, the information filled in for PandaTool.
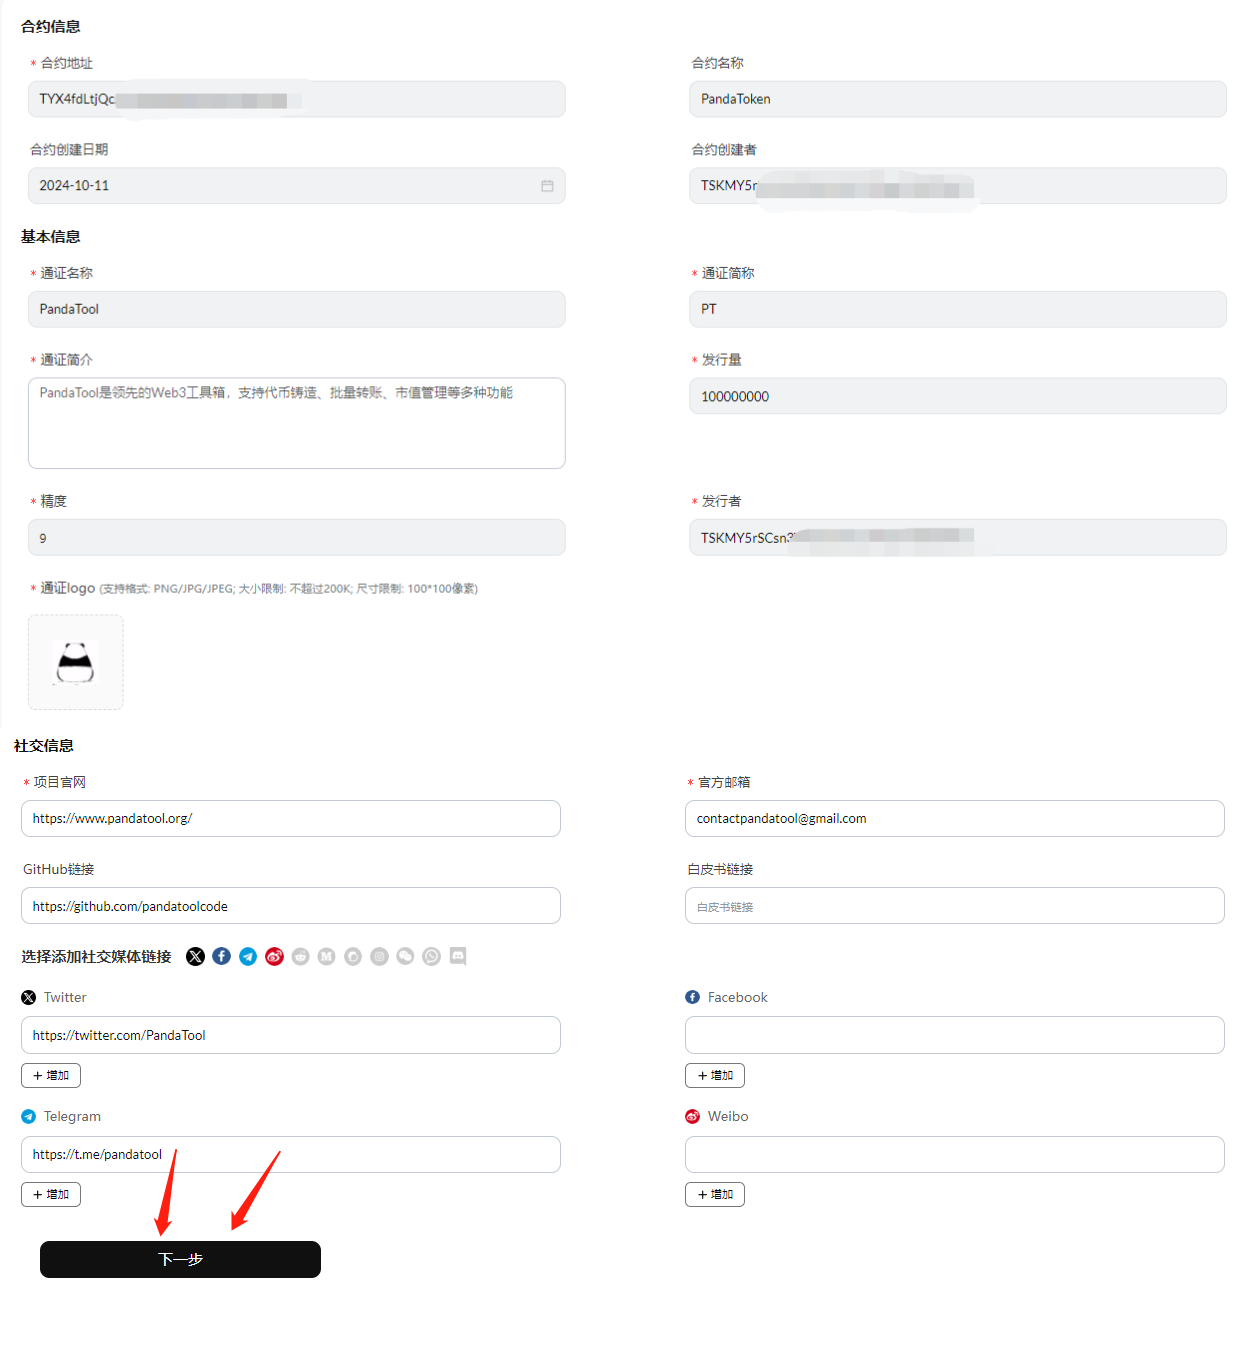
After confirming that the information is correct, we click next to proceed with Information Submission.
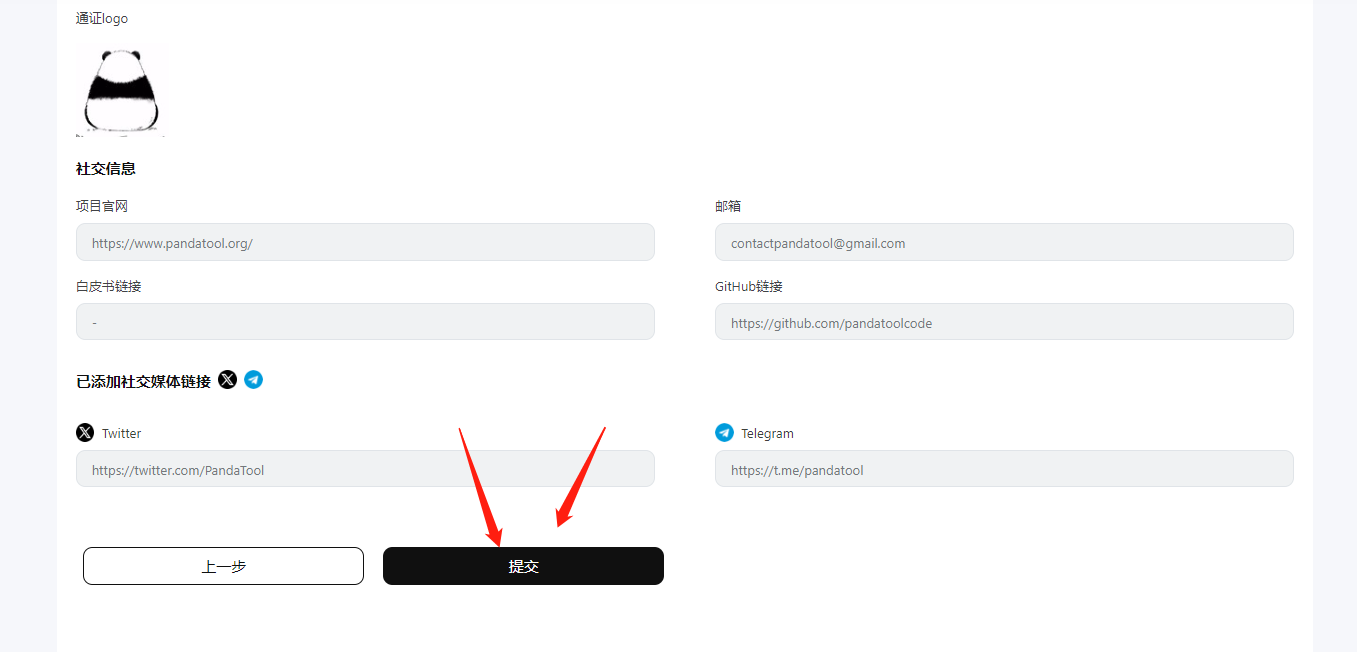
After clicking the submit button, a wallet prompt will pop up for signature confirmation.
After waiting a few seconds, you will be notified that the update was successful.
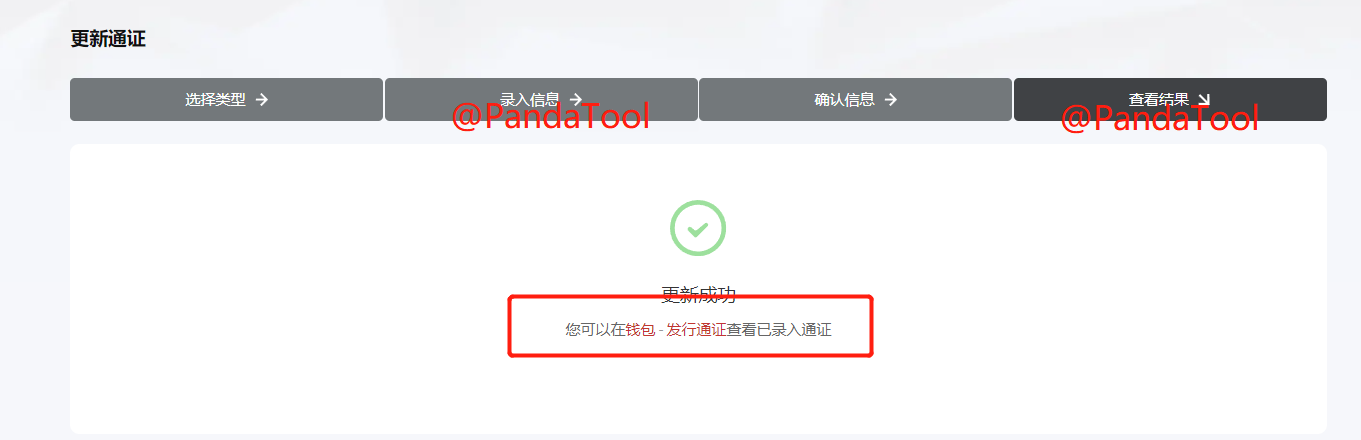
However, please note that this is just a prompt from the browser. In fact, this data may not have been fully updated yet. We need to wait for about ten minutes and then check the token again to find that the information has been uploaded.
This concludes the entire process of TRON tokens, from issuance to open source to information upload.
免责声明:本文章仅代表作者个人观点,不代表本平台的立场和观点。本文章仅供信息分享,不构成对任何人的任何投资建议。用户与作者之间的任何争议,与本平台无关。如网页中刊载的文章或图片涉及侵权,请提供相关的权利证明和身份证明发送邮件到support@aicoin.com,本平台相关工作人员将会进行核查。


